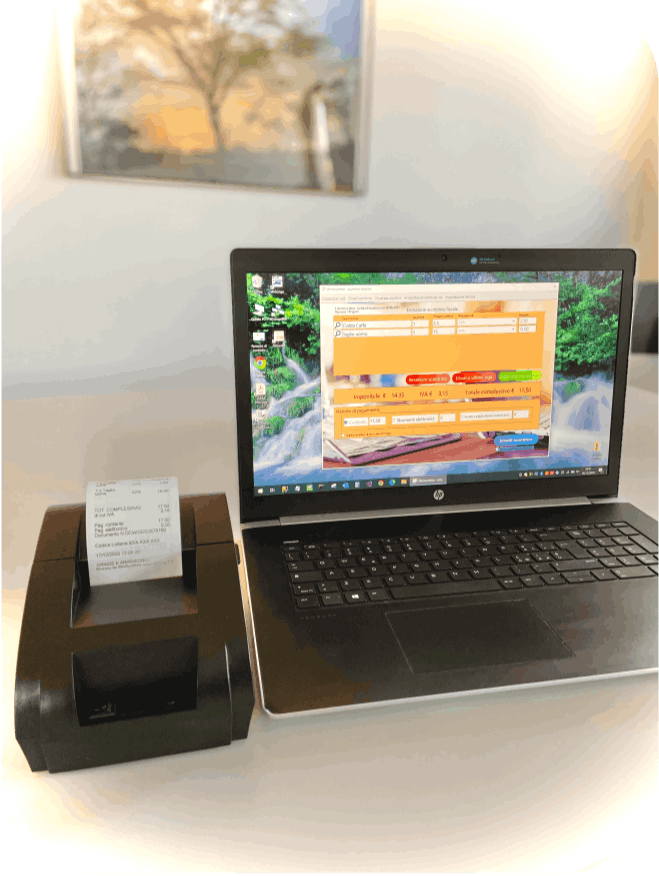
Site was

Norton Ghost Iso Uefi Guide


Stampante termica 58mm

Stampa gli scontrini

Il software WinScontrino può stampare su qualsiasi stampante termica da 58 mm.
Dimentica le stampanti fiscali da centinaia di euro.

Se invece non hai bisogno di stampare gli scontrini cartacei:

WinScontrino salva nella cartella Documenti/WinScontrino una copia in PDF dello scontrino ufficiale dell'ADE.

La stampante ha un costo di €60,00 e arriva in 2 giorni lavorativi

Come installare i driver delle stampanti termiche da 58mm su windows.

Kit Stampante

Arriva la stampante, cosa fare?

Dopo aver ritirato il pacco, all'interno del pacco trovi:
- la stampante
- il cavo di alimentazione
- il cavo USB - Printer
- 1 o 2 rotolini standard da 58 mm

Collega la stampante al PC

Dopo aver inserito il cavo di alimentazione e aver collegato la stampante termica al computer basterà soltanto scaricare ed installare i driver della stampante

Registratore di cassa

Premi qui sotto per scaricare il driver

Come eseguire driver installazione

Dopo aver effettuato il download del driver, bisognerà salvarlo sul proprio computer ed eseguirlo, come si vede in figura.


Thermal Print


Dopo aver eseguito il driver, portare avanti l'installazione.

Finale installazione driver

Ora è molto importante seguire la figura 4:

Premere nel menù a tendina ed andare a selezionare l'ultima voce: DIR58 IV
Quindi premere next e poi su finish e sarà dunque terminata l'installazione.

Dir58IV


Andare ad aprire il pannello di Windows Stampanti e Scanner


Premere sulla stampante DIR58IV e scegliere "Gestisci"

Porta

Seguire questi passi:

selezionare Proprietà stampante

Andare su porte

Selezionare la "porta stampante virtuale per USB" libera

Premere infine su "Applica" e la stampante sarà operativa.

Lo sai che puoi emettere i tuoi scontrini fiscali utilizzando solamente il PC?

Scopri WinScontrino

Registratore di cassa

Risparmi oltre 500 euro sull'acquisto del registratore di cassa
non hai nessun costo per gli aggiornamenti e hai inclusa l'assistenza tecnica sul programma.


Scaricando il software sul tuo pc puoi inviare 5 scontrini gratis all'Agenzia delle Entrate.

Norton Ghost Iso Uefi Guide

Creating a Norton Ghost ISO for UEFI systems requires a bit more effort than creating a traditional BIOS-based ISO image. However, with the right tools and a bit of patience, you can create a bootable Norton Ghost ISO that can help you recover your system in case of a disaster.

In the world of computer backup and recovery, Norton Ghost has been a trusted name for years. However, with the advent of UEFI (Unified Extensible Firmware Interface) systems, creating a bootable Norton Ghost ISO has become a bit more complicated. In this article, we’ll walk you through the process of creating a Norton Ghost ISO that can boot on UEFI systems. norton ghost iso uefi

Norton Ghost is a popular backup and recovery software that allows users to create images of their hard drives and restore them in case of a disaster. It’s a powerful tool that can help you recover your system in case of a hardware failure, virus infection, or other catastrophic event. Creating a Norton Ghost ISO for UEFI systems

UEFI (Unified Extensible Firmware Interface) is a modern firmware interface that replaces the traditional BIOS (Basic Input/Output System). UEFI provides a more secure and flexible way of booting operating systems, and it’s becoming increasingly popular on modern computers. However, with the advent of UEFI (Unified Extensible

To create a Norton Ghost ISO that can boot on UEFI systems, you’ll need to follow these steps: First, download and install Norton Ghost on a computer with a traditional BIOS system. You can download the software from the Symantec website. Step 2: Create a Bootable USB Drive Create a bootable USB drive using a tool like Rufus or UNetbootin. This will be used to create a bootable Norton Ghost ISO. Step 3: Create a Norton Ghost ISO Launch Norton Ghost and select “File” > “Create Image” to create a new image file. Choose a location to save the image and select the files and folders you want to include in the image. Step 4: Add UEFI Support to the Norton Ghost ISO To add UEFI support to the Norton Ghost ISO, you’ll need to use a tool like ImgBurn or UltraISO. These tools allow you to modify the ISO image and add UEFI boot support. Step 5: Modify the ISO Image Using ImgBurn or UltraISO, modify the ISO image to include UEFI boot support. This will involve adding a new boot entry to the ISO image and modifying the boot configuration data. Step 6: Save the Modified ISO Image Once you’ve added UEFI support to the Norton Ghost ISO, save the modified image to a file. Step 7: Test the Norton Ghost ISO Finally, test the Norton Ghost ISO on a UEFI system to ensure that it boots correctly.

Creating a Norton Ghost ISO for UEFI Systems: A Comprehensive Guide**

The problem with Norton Ghost and UEFI is that the software was originally designed to work with traditional BIOS systems. As a result, the bootable ISO image created by Norton Ghost may not boot on UEFI systems.

Site was